The Intterra Airborne Intel DSA is a Windows executable that makes the process of transferring common airborne intel files to your S3 bucket easier and eliminates the usual problems that come with it. It supports users who are manually naming and copying files to S3.
This article covers:
Features
- Renames files to the Option B (GeoOps) naming convention
- Corrects mission naming issues by replacing any non-permitted special character with a 'dash'.
- Converts local time to the required UTC (Z)
- Uses the product file date/time to assign the product date/time rather than the time loaded using the DSA to better reflect when the product was created*.
- Has 2 storage modes available in the user configuration
- remote - sends renamed files to the S3 bucket
- local - does not send the files, but provides the correct name in the app
- Supports the following product type naming
- Videos: .TS file format for video clips
- Imagery: .TIF geotif files for all currently available product types
- IRimage
- EOimage
- HSimage
- Tactical: .KML files for the following product types
- Detection
- HeatPerimeter
- IntenseHeat
- IsolatedHeat
- ScatteredHeat
- Does not directly support for following
- Optional Product Description tags - i.e. acres for HeatPerimeters
- Some uncommon Tactical Product Types - i.e. structures, routes, etc.
Setup
- Go go https://github.com/intterra-io/intterra-airborne-dsa/
- Under Releases, click on Latest
- Click to on airborne-dsa-windows-amd64.exe to download. If blocked by your browser, select download anyway.
- Create a working folder for the DSA and copy to the .exe there
- Configure a text file named config.json and save it in the same folder. Contact support@intterragroup.com if needed for the bucket, access key and secret information. Storage mode will be either local or remote.
{
"bucket": "",
"awsAccessKeyId": "",
"awsSecretAccessKey": "",
"storageMode": ""
} - Optional - create a shortcut or pin to taskbar for the exe file
Running the DSA
The basic process is to start the app, create the mission, then copy files to the active mission and product folder created by the app. The app will handle the rest - a mission will be created and product files will be shipped to S3 to the correct folders with the new compatible files names as they are copied in.
Start the DSA - double click on file or click on shortcut. If blocked, Run Anyway.
Steps
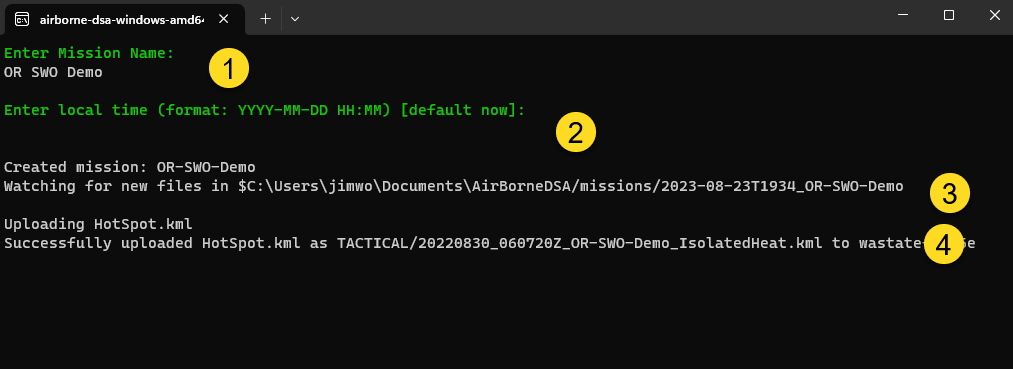
- Enter a mission name and press enter.
- Enter a mission local time, or simply press enter to use current time (default). A mission file is now sent to S3 and users will see the mission with a planned status.
Manually entering a time is used when products are loaded after landing or when a significant time delay has occurred since being collected. The app creates a missions folder (in the same folder as the app) for the active mission. - The app creates subfolders for all the product types and is 'watching' for products to be added for the active mission.
- You can now MOVE files to the proper product folder for the active mission. Files are sent to the correct S3 bucket/folder with proper naming (if the config storage mode is set to 'remote' and the internet connectivity is adequate). Users see mission status changed to collecting and products displayed. NOTE: The files themselves in the mission folder are NOT renamed.
IMPORTANT: Files must be 'moved' or 'cut and pasted' to the mission folder. This includes dragging a file as long at its on the same drive.
Adding files by copy and paste or dragging from one drive to another will result in an immediate [Errno 13] Permission denied error.
The above is true regardless of using Windows Explorer or Command Prompt.

Important: If the config's storage mode is set to 'local' or the internet connection is not adequate the file to successfully transfer, the app will provide a warning, but it will NOT continue to watch that file for loading to S3 later. It does, however, provide the correct 'S3' file name for the file. When reloading later in good comms, note that overwriting the same file in the mission folder that failed to load will not trigger the loading to S3. You will need to either modify the input file name slightly or delete the 'failed' file before adding the file again.
When a mission is done, close the app. Restart the app to start a new mission/incident.
Suggested Workflows
- In Flight - Best - Products are provided to the users in a timely manner. If comms are adequate for loading all the files types, simply run the app in flight and create a mission prior to collecting and saving products. If a file fails, add it later as noted below in Post Flight.
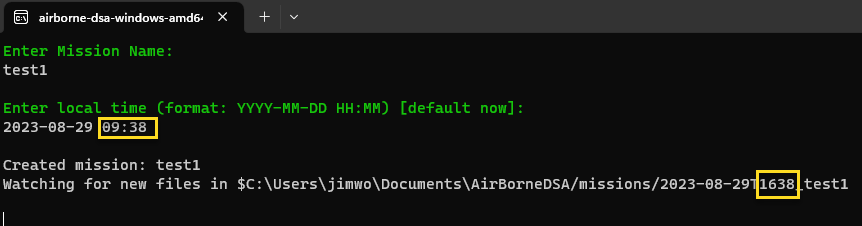
- Post Flight - Run the DSA as described under steps above. If you have closed the app and want to continue using a previously started mission, simply use the same mission name and time as is in the mission folder that DSA created. Note:
- The time format in the folder name different from the DSA prompt.
- Also, the time in the folder name in UTC (Z) and local in the DSA prompt.
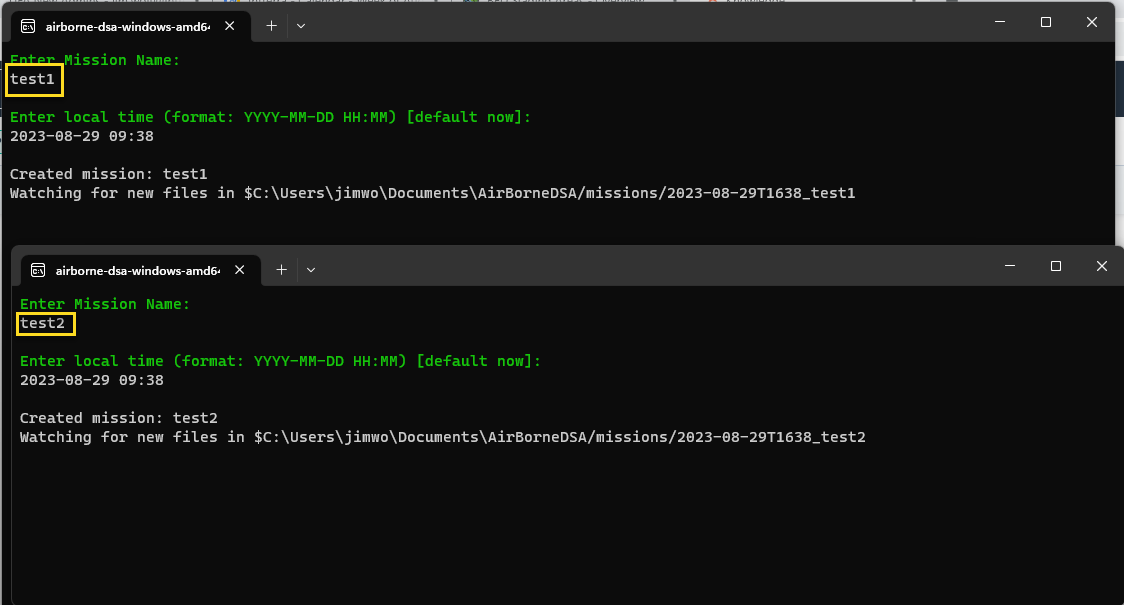
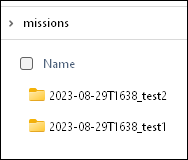
- Multiple Missions - It's not uncommon to collect products for several incidents on the same flight. The typical practice is for each incident to have a different mission name. To avoid the need to start, stop and restart the app to later load larger files in poor comms, you can run multiple instances of the DSA and load files to the proper mission folder.
* Date/Time stamps - The DSA uses the file Date/Time to assign a product date/time. This may or may not be the media creation date/time depending on how the file has been moved or copied. Media creation is not available for imagery or tactical files in Windows File Manager.

Important: The mission timestamp needs to be earlier that the product times for the products to be associated with that mission in the Intterra app - so start the DSA before saving products. If adding products later, take a look at the file date/time for the earliest product and make sure that the mission time is earlier. This may be complicated if the flight covered several time zones and the onboard system was updating.