Admins can also assign users to different user roles, and can export a list of all users. The following sections will walk you through the necessary steps.
Included in this article:
-
- How to add a single user
- How to Clone a user
- Update/edit a user
- Delete users
- View and Manage Locked Accounts
- Export user list
- Bulk user edits
- Bulk user imports
Add Users
There are three options for admins to add users:
- Manually add a single user.
- Clone a single user to add a single user. This is useful when adding users with common descriptions and role settings.
- Send out a special URL (as a QR Code or bit.ly, if you like) where a larger number of users can be invited to set up their own account.
Additionally, the Intterra Account Manager can add do a bulk upload of users.
To add a single new user:
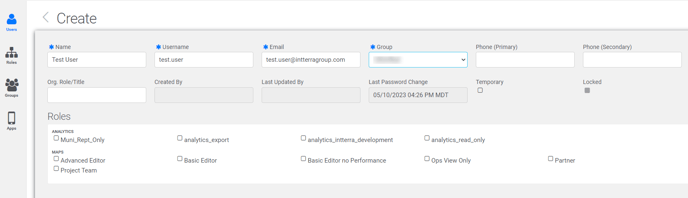
Within Settings, ensure you are in the Users section (in blue on the left). Click New. Both options require that the added user verify their email address; tell your new users to keep an eye out for an email from Intterra Communications in order to complete their account setup.

Complete the required fields, noted with a blue asterisk.
-
Name: This will be displayed at the top of the user's system, site.
- Username: This must be a continuous set of characters (no spaces). TIP: Choose the same username as the new user's email address (for example, with the email address user.123@intterragroup.com, the username could be user.123).
- Email: The new user's email address.
-
Group: The internal Intterra account name assigned to your agency. Use the dropdown to select.
-
Optional fields:
- Phone: Phone number.
- Org. Role/Title: For larger accounts, such as state accounts, this could be used for each user's organization name.
- Temporary checkbox: This can be used for someone who will not be with your organization permanently. If you select this box, you can easily find accounts that you would like to export or delete.
- Roles: Choose a listed role for the new user, or leave it blank for the Default role.
Note: Intterra supports a self-registration process that allows several new users to be added at one time using a URL/bit.ly/QR Code. However, this is not a recommended process in most cases. For most information, contact your account manager.
Update/Edit a User
As an Intterra Administrator, you can update nearly all of a user's information. The only exceptions include the username and email address (because those are the unique identifiers and keys for the user record).
Within Settings, ensure you are in the Users section (in blue on the left). Use the search bar to locate the user (by their name, username, group, role, etc. according to the syntax indicated in the search box prompt).

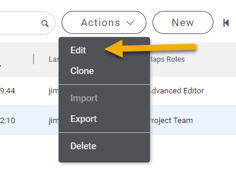
Once the user is found, click on Actions and then Edit (alternately, you can right-click on the row with the user's name and then select Edit).
Make the necessary updates, and don't forget to click Save.
To delete a user, follow the steps from Update a User (above) to navigate to the user's details.
At the bottom of the user's profile, select Actions and then Delete.
NOTE: From a database perspective:
- Users get logically deleted if they have never logged in and they were created more than 365 days ago. (The user's access is revoked.)
- They are physically deleted after another 365 days. In between that time period, an admin can resurrect the account; contact support@intterragroup.com if you feel you have several users with this status.
- These time periods can be adjusted for your system.
User Roles
All users have specific roles (such as "ProjectTeam," "ViewOnly," "Collector," etc.).
Roles are used to group data, tools, and workspaces into specific packages for classes of users – allowing System Administrators to coordinate access to specific features and data. Roles dictate what a user can see and do in each workspace.
To assign a role to a new user (or update the role of an existing user):
- Follow the steps to Add a User or Update a User (above).
-
Before tapping the Save button, decide the user's functional role. Typically, the options under Roles include:
- Select no role; this gives the user the Default role (as indicated in the Group Details, initially set to All Capabilities in the account, such as map editing and access to all tools in your agency's Intterra system).
- Select a listed role; this has the impact of limiting what that user can do in your Intterra system. NOTE: Assign no more than one role.
NOTE: Contact your Intterra Account Manager to assign an Admin role.
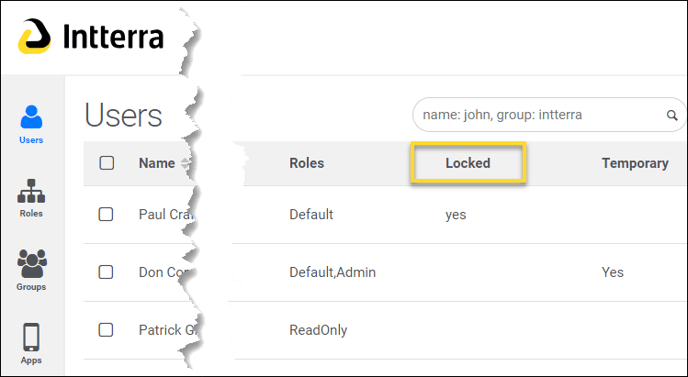
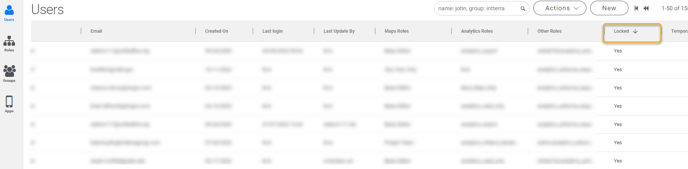
TIP: To view locked users, scroll to the right to expose the "Locked" column and then sort by that column.
Two situations will produce a locked = 'yes' for users:
- Newly added users who have not yet validated their account. The 'locked' users have an Intterra system account validation email that they have not responded to.
- An existing user who has been locked due to a password problem. Six failed login attempts will lock the account.
Administrators can unlock users or reset the password for locked accounts.
- In the Settings Page, select the 'locked' user to which you want to manage.
- Click on Actions.
- Click on Edit.
- At the bottom of the details page, select Actions
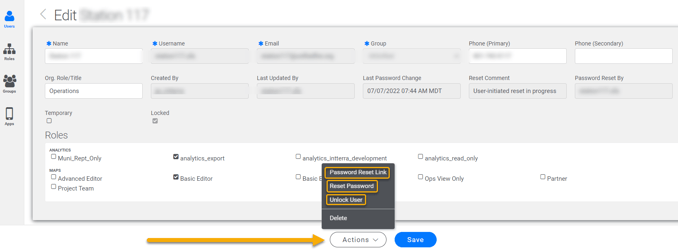
- Select either:
- Password Reset Link to view a popup containing a link that can be emailed, or shared via instant message with the user. This can be handy if the user is having difficulty receiving the change password emails.
- Reset Password to reset the users password. This is the same as the user clicking on recover account on the login page. They will receive an email with a link to recover their account. They will need to click on Recover Account and select a new password.
- Unlock User to unlock the account. The is no change to the password or notification to the user. This is option is helpful for users who don't have access to email and know their password.
Export User List
To export a list of users, visit Settings and ensure you are in the Users section (in blue on the left). You can sort the list before or after the export process.
If you want to reduce the exported list to users who, for example, are within a certain role, use the search bar (example: "role: ViewOnly").

Check the top-most selection box to select all users in your chosen list or pick and choose which names you would like to export. Select Export from the Actions
dropdown menu. The CSV file will export to your computer's Downloads folder.
Bulk User Edits
You can make bulk changes to a user’s phone, organization/title, temporary flag, and role.
- Select all the users to which you want to apply the bulk edit.
- Click on Actions.
- Click on Details.
- Edit.
- Save.
Bulk User Imports
Your Intterra Account Manager can do a bulk import of a list of users.