Created for tracking dozens of events related to Super Bowl 50, Special Event planning is being used for university and civic stadium events, marathons and races, farmers markets, road closures, public gatherings and protests, COVID shot events, active shoot scenarios, and more. It is ideal for preplanning reoccurring events.
Overview Video - 3 steps to create and use Event Plans.
Overview
In order to make an entire event appear on your Intterra operational map, you need to keep in mind how our Special Event Planning tools work together.
The overall workflow is:
- Add an Event to the map and enter an event name (and optionally other event info)
- Build out the plan, adding event points, lines and areas, being sure to associate each one to the event
- Activate the event to appear and/or be removed in Ops by editing the Event icon by editing the Activate Now or Timing tabs
NOTE: If you are adding additional event preplans in the same vicinity, check out Planning for Multiple Special Events.
Steps
Follow these steps with the Preplans (PiP) workspace (or where your agency edits preplans):
Step 1 - Add Event
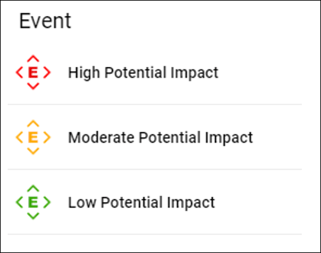
- Place an Event icon on the map. Select the Level of Impact and locate it on the map. Check out Adding to the Map.
- This will open the editing dialog. The most important field is the Event Name because this is how you associate all of the features that are pertinent to the event.
- If you plan to activate the plan using date/time, you can fill in the Event Times, found on the Timing tab now or edit later - see Step 3 below.
- Save
Step 2 - Build out the plan
- Add additional points, lines, areas and labels. Check out Intterra Preplan Symbology for reference.
- Associate each added feature with the event. Again, the most important field to complete for each feature is the Event Name since this is what associates it the event and event activation. Also, once you do, you’ll notice several fields autofill with the information you previously added for the Event (Site Address, Event Number (for the case of multiple events/multi-agency response), Commanding Agency, Contact Name, Contact Phone, Contact Email). This helps to reduce duplicate typing and can always be overridden should a specific feature have a different commanding agency than the event itself.

Step 3 - Activate the event to appear and/or be removed in Ops 'In Progress' by editing the Event icon
- Click on the Event icon on the map
- Select the Event icon from the selection panel to open the editing dialog.
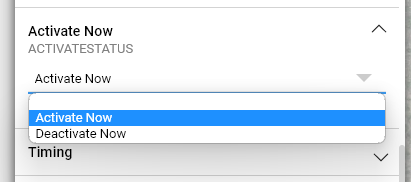
- Choose manual or timed activation:
- To manually activate the Event plan click on the Activate Now tab and select the desired the Activate Status
Note: This is a one-time trigger when saved. If there are any time stamps in the timer tools, these will be flagged to be excluded from status updates. This 'exclude from status updates' setting will persist after the event is deactivated, so remember to change it back to No if your want the timing settings to work.
- To use timing to activate the Event plan click on the Timing tabs
-
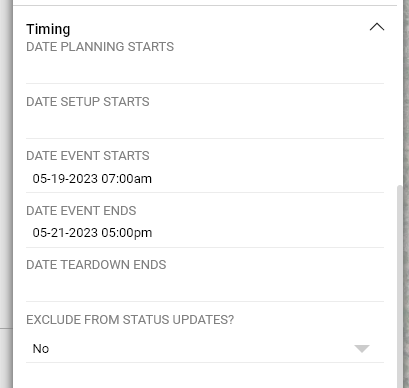
- Generally, users will only have an In Progress event displayed on their operational map, so it is our recommendation that you set the Date Event Starts time to a few hours earlier than the actual start.
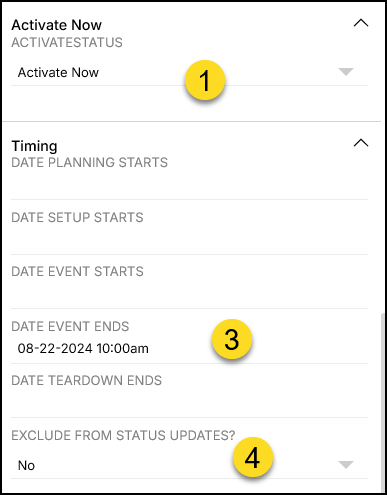
- Only include timing for Event Start and Event Ends as shown below.
- Timing Definitions:
- Date Planning Starts – Moves all associated features into a Planning status.
- Date Setup Starts – Moves all associated features into a Setup status.
- Date Event Starts – Moves all associated features into an In Progress Status.
- Date Event Ends – Moves all associated features into a Teardown status.
- Date Teardown Ends – Moves all associated features into a Complete status.
- EXCLUDE FROM STATUS UPDATES - Keeps the time tools from updating the status via the Timer, even if time stamps do exist. Default is blank. Use 'Yes' only is you want to keep the times in the Timing tab, but don't want them to change the status.
- Timing Definitions:
The Other status indicates any errors in time/date entry. These events will show in the Special Event - Time Entry Error layer located in the same workspace as the Edit Special Events layer.
NOTE:
- Times MUST be sequential. If any time (from top to bottom) comes after the next time, the entire event will go into an Other status.
- The timer tools that are responsible for updating the status run ONCE per hour, four minutes past the hour mark – this is to make sure that anything set at the top of the hour gets included with the tools.
- When looking at the display service, these times will be in UTC. When looking at the editing service, these times will show local time. The time tools display in UTC so that your event will show on the map at the right time for your time zone.
Step 4 - Save
Troubleshooting the event timer
If the event is not showing up in Operations as In Progress as expected, check these out:
- Remember - the timer tools that are responsible for updating the status run ONCE per hour, four minutes past the hour mark
- Make sure that the times are sequential from top to bottom. Check for a 'Other' event status or the Special Event - Time Entry Error layer
- Make sure that the Activity Now is set to null (blank)
- Make sure that the Timing - Exclude from Status Updates to set to 'NO' (default).
- Make sure that all mapped features are associated with the Event Feature using the correct EVENT NAME.
Special Use Cases
To activate an event now and then schedule it to end at a scheduled time:
- Set ACTIVESTATUS to Active Now
- Save the event (important)
- Set the DATE EVENT ENDS date and time
- Make sure to set EXCLUDE FROM STATUS UPDATES to No
- Save