Home Risk is complex and, therefore, requires work on the Intterra side to complete the setup for your organization. The Home Risk framework includes:
-
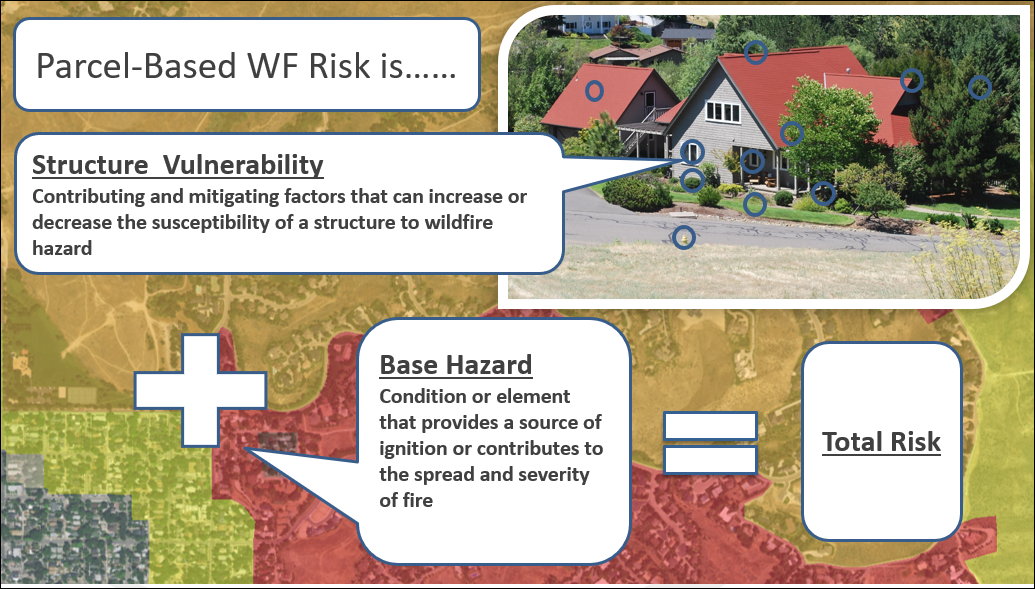
Definition of Base Hazard.
- Description of the base hazard specifically oriented around the Fire Hazard Severity Zone assessment or other risk assessment layers related to the likelihood and intensity of a wildfire event.
-
Identification and Weighting of Contributing and Mitigating Factors.
- Identification and description of factors that can increase or decrease the exposure of a value at risk to the base hazard (structure vulnerability).
- Map visualization and reports to communicate the total parcel risk that takes both base wildfire hazard and the structure vulnerability into consideration to share data directly with responders and community managers.
- Optionally, reports and interaction capabilities to communicate directly with the homeowners.
Home Risk Framework
The home risk framework is parcel-based and is designed to display a total risk for the parcel based on the structure vulnerability of a primary structure and the base hazard assigned to the parcel.
NOTE: Each parcel in Intterra is set up for the description of one structure, but you will have the opportunity to make a note of the total number of structures on the parcel. The system will allow users to complete additional structure assessments per structure, but the total risk score will only represent the last one saved by the inspector in the system.
This article describes how to accomplish the following tasks throughout several sections (below):
- View Home Risk on the Map
- View Details in the MapTip
- Collect (Add) a Home Risk Assessment
- Edit an Existing Home Risk Assessment
- View Assessment and Summary Reports
NOTE: Structure data can be entered into Intterra in two primary ways:
- If completely or partially available, structure data (such as situs or address points) can be pre-loaded into the system by Intterra as unrated structures.
- If not yet gathered, structure data can be collected by a local department using Intterra (web) or the Field Tool.
See Home Risk Tool - Public Interaction for more information on how the public can view and interact with their assessment. NOTE: Public Home Risk Interaction is optional and not a standalone option because the risk assessment is made of the core component.
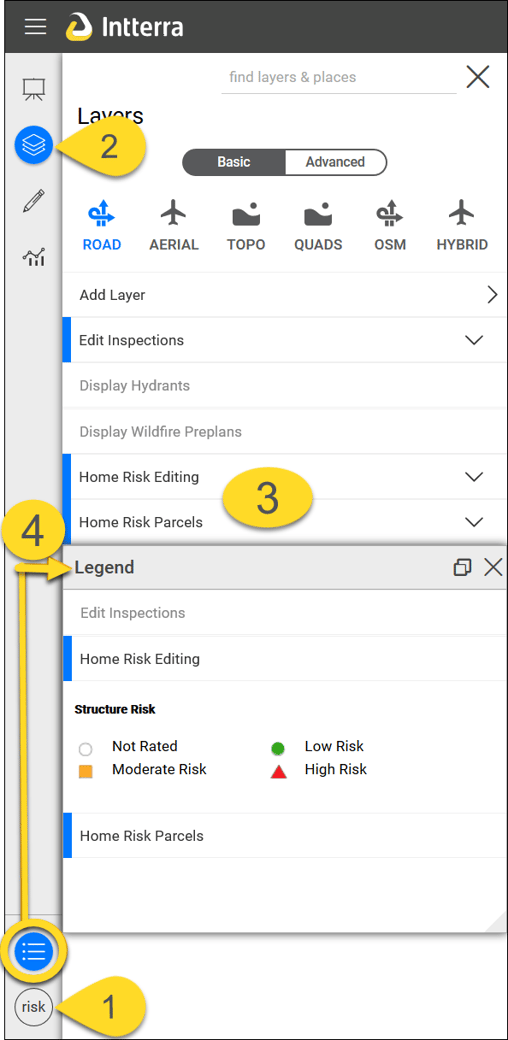
View Home Risk on the Map
Home Risk is a data layer that is usually set up in the Risk Workspace for adding and editing, and is typically viewable in the Operations Workspace.
To see the layer in Intterra:
- Switch to a workspace that has the Home Risk information.
- Click on Manage Layers.
- Toggle on the Home Risk layer(s).
- See the Legend for Home Risk classifications and symbols.
NOTE: If your screen doesn't look exactly like what you see in these images, don't worry. Home Risk data may look different in your system, may be located in different workspaces, may have a different layer name, etc.
TIP: Due to a potentially large amount of data, you may need to zoom in before the layer turns on in the view.
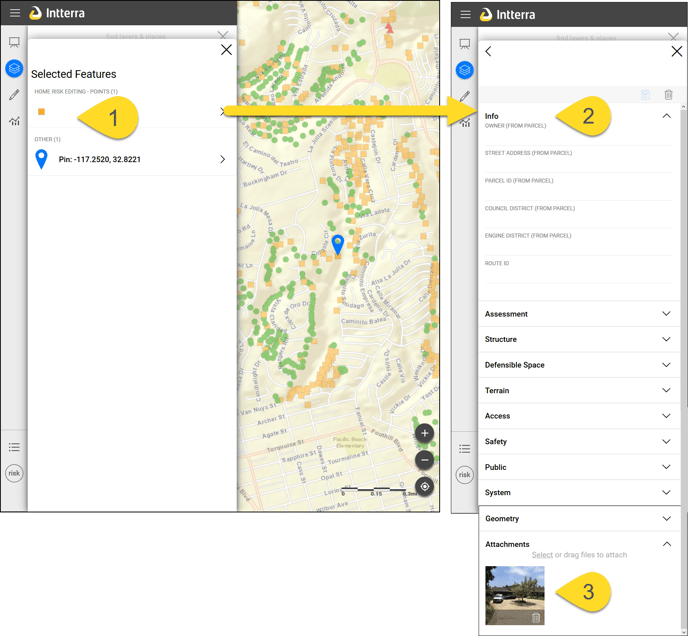
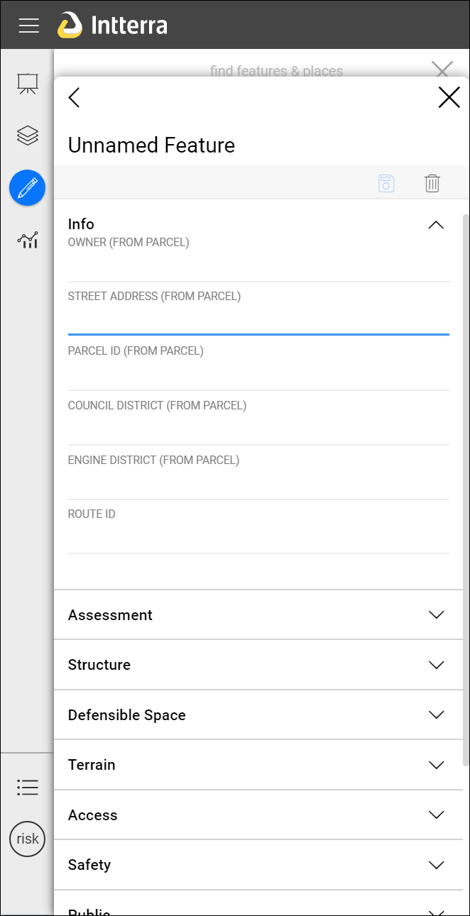
View Details in the Info Panel
Clicking on a risk assessment icon on your map will open the Info Panel.
- Select the assessment of interest from the list of options on the left.
- View details within the Info Panel's dropdown tabs.
- Scroll to the bottom of the Info Panel and locate the Attachments tab. If any photos have been attached, you can view them here.
Collect (Add) a Home Risk Assessment
New Home Risk assessments can be added using Intterra (web) or the Field Tool.
To add a Home Wildfire Risk assessment using Intterra, follow the instructions in Adding to the Map and Adding Photos. Adding and editing of Home Risk assessments is usually set up in the Risk Workspace in Intterra. For details about adding data using the Field Tool, see Collecting in the Field Tool.
TIPS:
- The first photo taken and added to an assessment is what will be displayed in the risk assessment report (below), so its good to start with capturing an overall view before starting the assessment.
- Some clients have preloaded unrated assessments that typically display as empty circles on the map. It is best to edit these unrated assessments rather than add new ones to avoid double counting structures. Refer to the Edit an Existing Home Risk Assessment section (below) for more information.
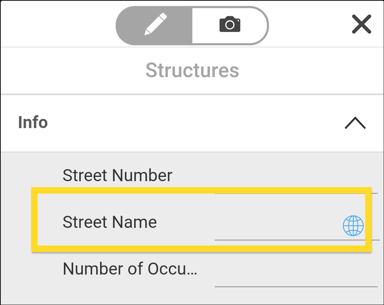
- Make sure you select the address from the dropdown list, if available, to ensure the correct address, owner information, etc. autofill from the parcel data. You can tell if the data is available if the Street Name field is highlighted blue in Intterra or has a blue globe in the Field Tool. If the correct address is not visible, type it in manually. See Why don't I see the correct address in the auto-fill list? for additional information.
Example - Intterra
Example - Field Tool
Edit an Existing Home Risk Assessment
Editing is helpful for updating the address, structure information, location, or any photos for existing or unrated assessments.
Wildfire Risk information can be edited using Intterra (web) or the Field Tool.
To edit a Home Risk assessment using Intterra, follow the instructions in Edit the Map. Editing of Home Risk assessments is usually set up in the Risk Workspace in Intterra. For more information about editing while using the Field Tool, see Editing in the Field Tool.
View Assessment, Summary, and Homeowner Reports
Several PDF format Home Risk Reports can be generated by lassoing an area of interest in Intterra. These reports provide quick access to assessment details and summary information that can then be printed or emailed.
To find the reports:
- Go to Tools Menu and select (Risk) Reports.
- Tap the blue Select Area button and follow the directions to draw a shape around the properties or neighborhood of interest. NOTE: The more properties that you select, the longer the reports will take to generate; we recommend selecting parcels by neighborhood, rather than by town.
- When the reports are ready, they are listed by report type below the blue Select Area button.
- Tap the report to see the results.
- You then have options to print from the report window, as well as view the reports in a separate web browser tab.
- Click Print to print the report to PDF or on paper.
- Click Open in New Tab to view the full report in a new browser tab.
- Click Close to close the report (so you can then refine your report query, move on to other tasks, etc.).


For additional information about the three types of reports, see Home Risk Reports Tool.